Installation Video
Chimney Relining Done Right!
Step 1: Flue Preperation
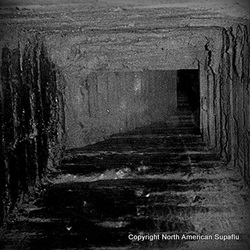
Prior to installation, the chimney is inspected, cleaned, and prepared using industry recognized procedures & equipment. Should the flue already be lined, the existing liner is removed. All openings such as clean-outs, thimbles, and fireplace openings are sealed and secured.
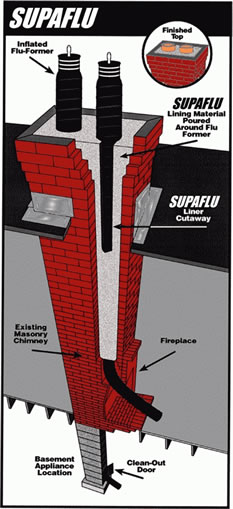
Step 2: Material Installation

The proper former is calculated for your heating appliance. The inflatable rubber former is then lowered into the flue, inflated, and centered. The Supaflu lining material is prepared (adding water) then pumped into the chimney from the top. All voids, cracks, and holes are filled with the slurry.
Step 3: Former Removal
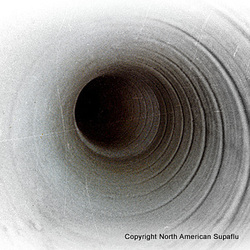
After the new Supaflu liner has fully cured, the former is deflated and removed from the flue, leaving a smooth, round, one-piece liner. the new crown is and wash is installed at this time.